![[Return to Homepage]](/assets/imgs/RAMlogo.png)

Dennis Collier Studios creates stunning designs in hand carved wood, and has been commissioned to sculpt pieces for prestigious architectural design firms such as Allan Greenberg, Johnson and Wanzenberg, and Robert A.M. Stern. His work is prominently on display in numerous United States Government buildings including the State Deptartment and White House.
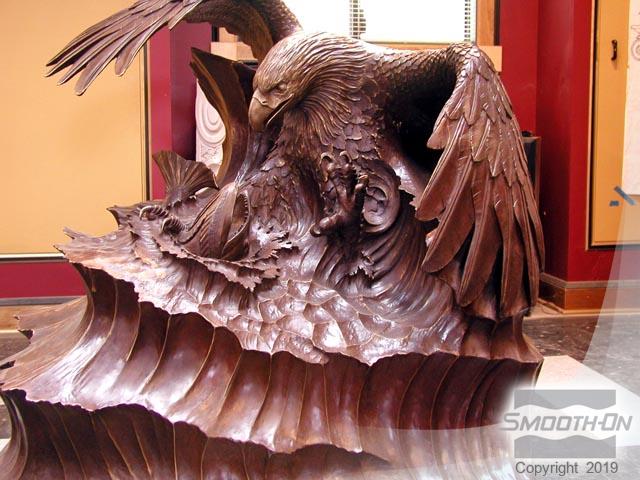
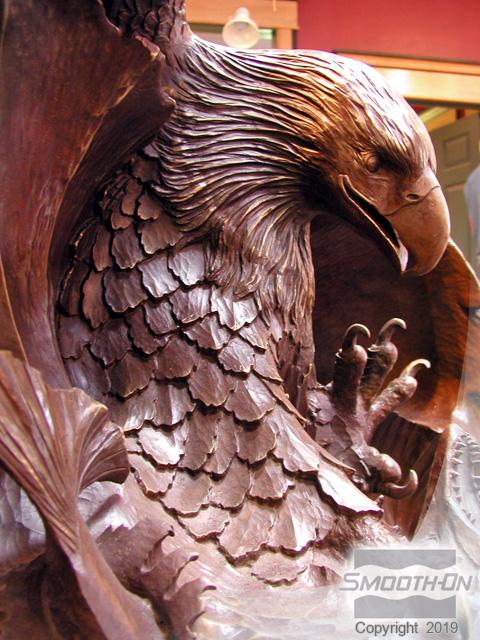
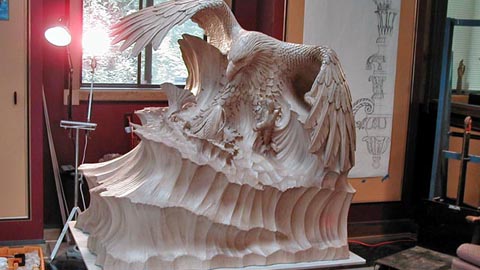
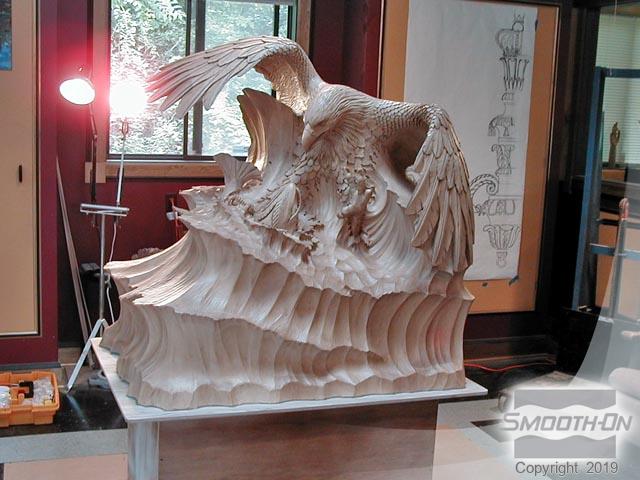
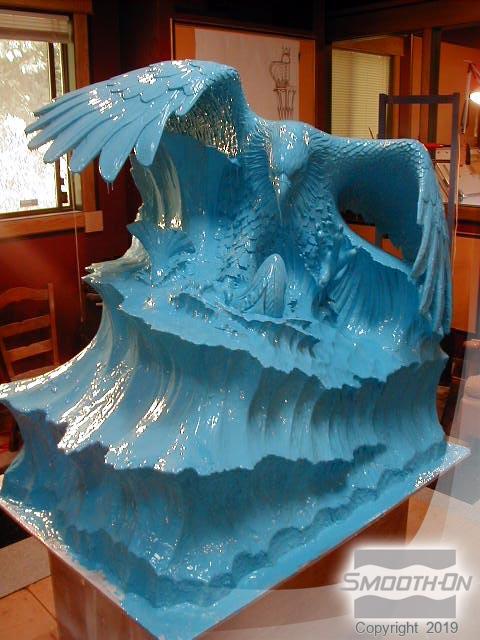
Many times Collier's shop is called upon to reproduce the wooden sculptures in resin and/or bronze as well. The gallery below documents molding and casting of a highly detailed wooden sculpture, featuring an American Bald Eagle catching a fish. Since the wood sculpture could not be harmed in any way, it had to be molded with a very soft, yet strong rubber in multiple pieces.
After consulting with Smooth-On, the mold material choices were to use Mold Max® 10 silicone rubber thickened with Thi-Vex® II, and to use Plasti-Paste® for the support shell. After the mold is completed, it is then slush cast using Smooth Cast® 65D liquid urethane plastic on a custom made pivot-jig designed to accomodate this large mold.
View The entire Collier Woodshop portfolio by visiting: www.woodsculpture.com
You Will Need: Mold Max 10, Silc Pig, Thi-Vex, Plasti-Paste, Rotocast Machine, Smooth-Cast 65D, Mixing Containers, Paint Brushes,
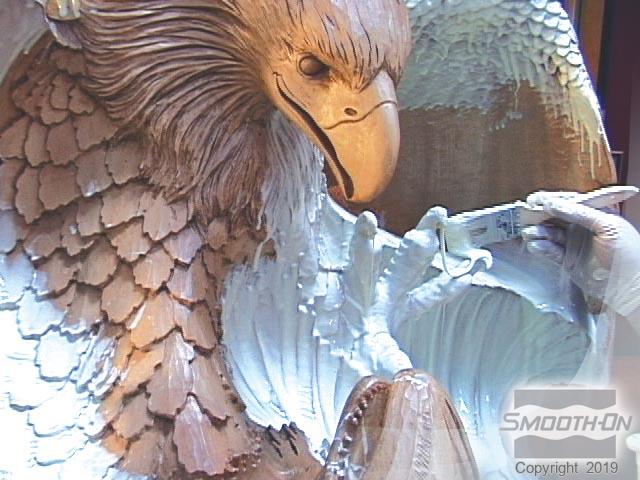
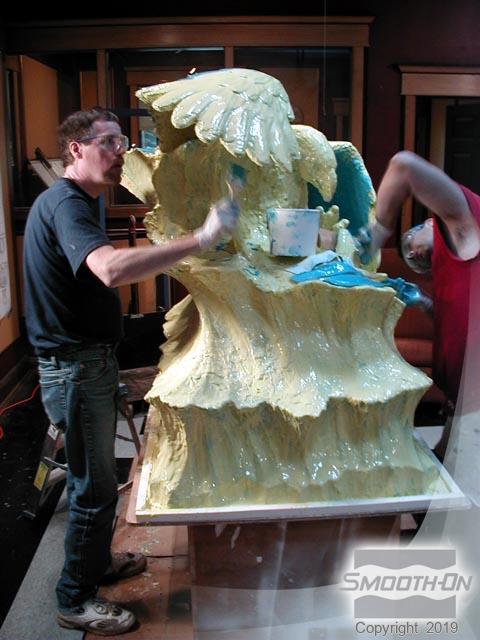
Step 1: Applying First Layer of Mold Max 10
We begin with the original wooden sculpture by Dennis O. Collier. Measure and mix a batch of Mold Max® 10 and apply the first layer by brushing it onto the model. Be sure that the entire surface is evenly coated with a very thin layer of the silicone rubber. This is a very important 'detail' or 'print' coat.
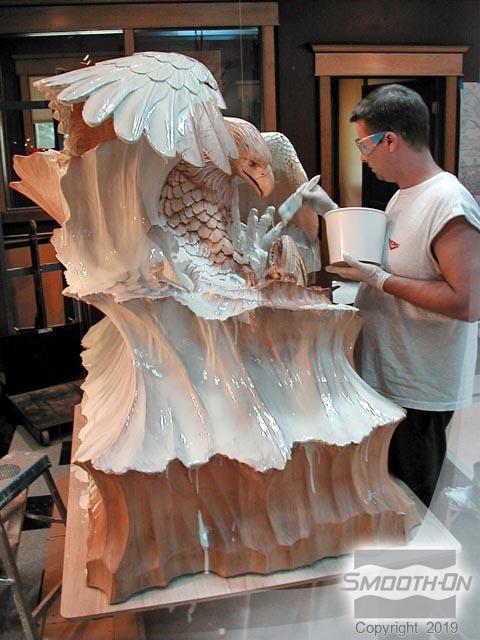
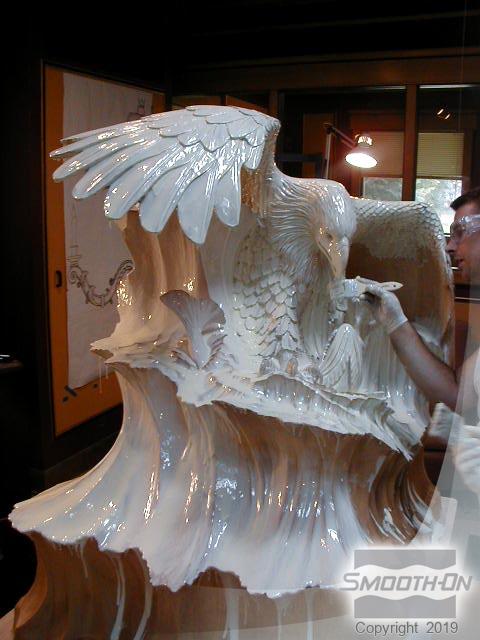
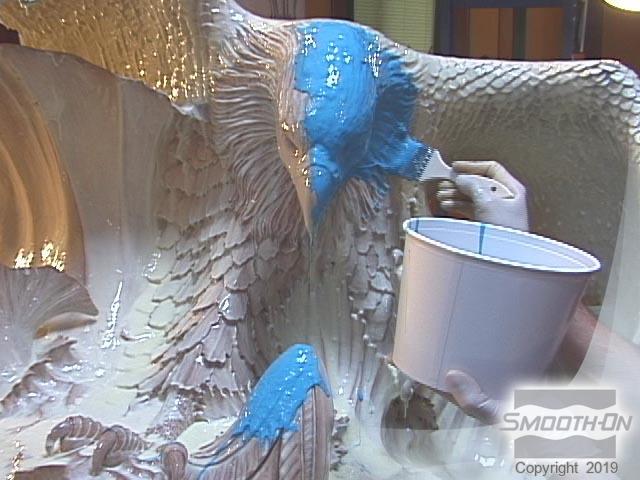
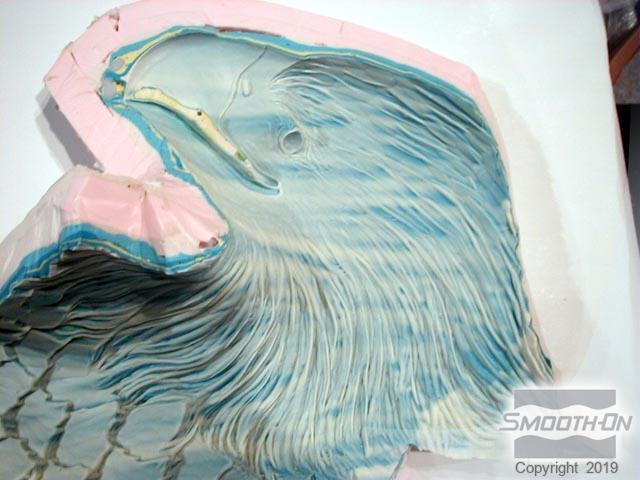
Step 2: Applying Additional Layers of Mold Max 10
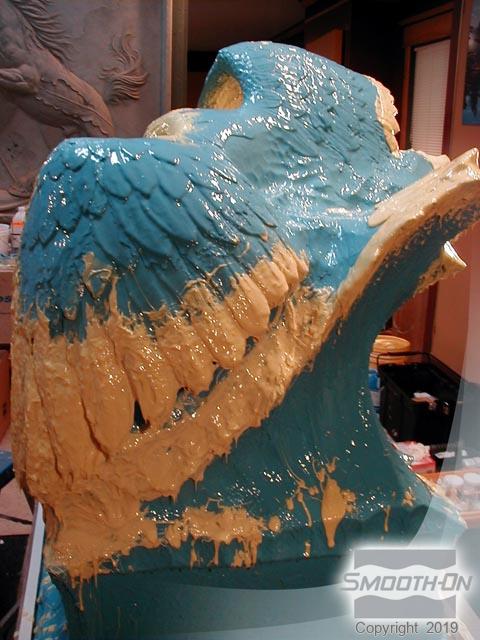
Measure and mix the second layer of Mold Max® 10, this time adding SilcPig® silicone pigments before applying it to the model. Next, apply a third layer of Mold Max® 10. Use Thi-Vex® II to thicken the fourth layer and SicPig® pigments to color the rubber, and then apply the fourth layer, filling undercuts and adding support to the entire mold.
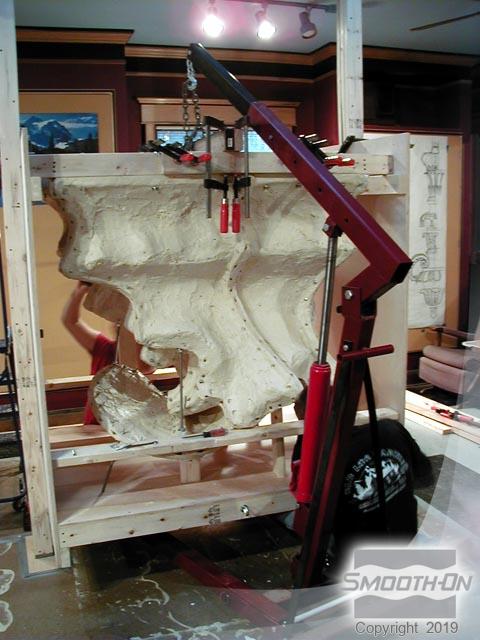
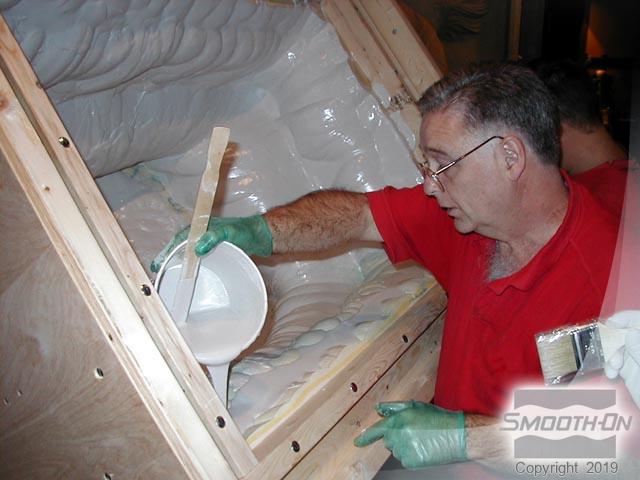
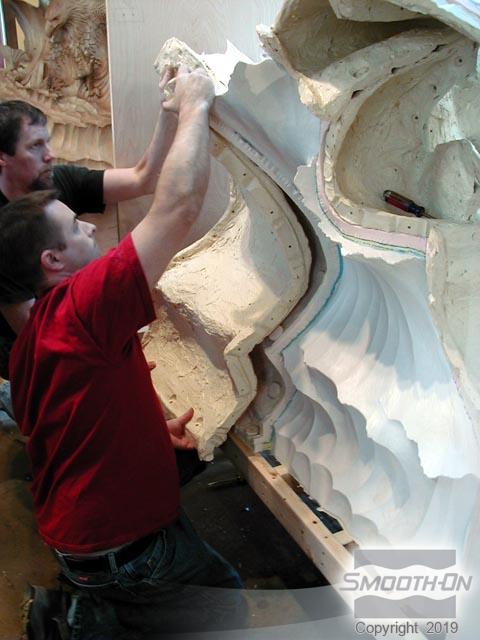
Step 3: Placing Mold into Roto Casting Machine
Place the mold with the multi-piece Plasti-Paste® II support shell onto the custom pivot-jig via an engine hoist. This will enable the mold to be slush cast. Tilt the pivot-jib into position in order apply the resin.

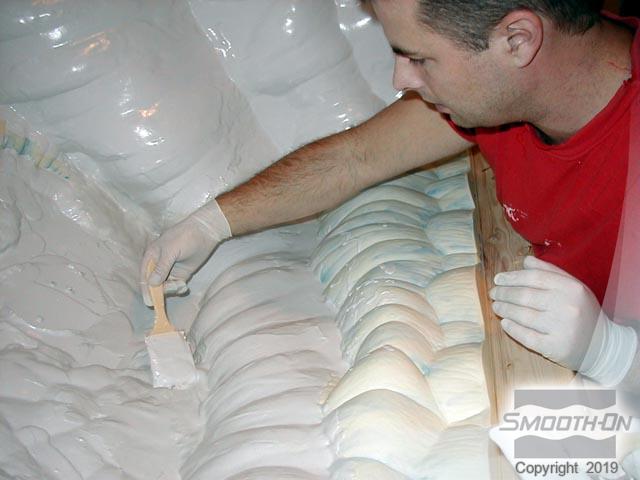
Step 4: Casting with Smooth-Cast 65D
Pour Smooth Cas®t 65D liquid resin over the inside surface of the mold. Brush the liquid resin into the fine details to ensure thorough coverage. Position the pivot-jig to allow application of the liquid resin into all quadrants of the mold. Repeat this process several more times until a sturdy hollow resin skin of adequate thickness is built-up.
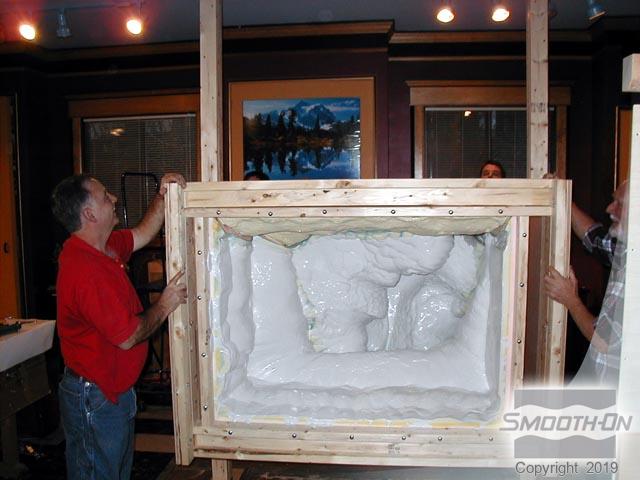
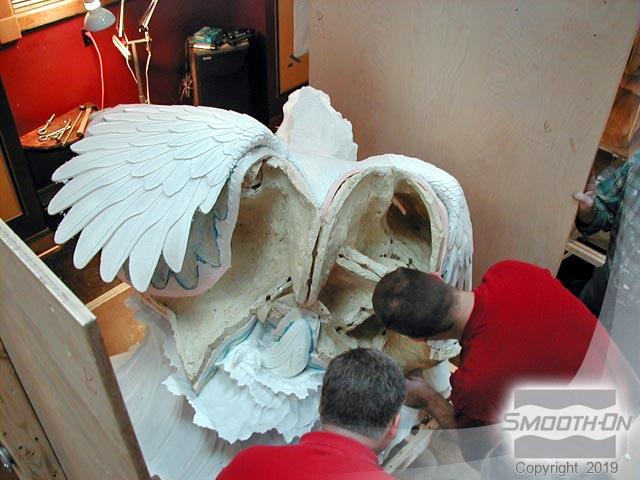
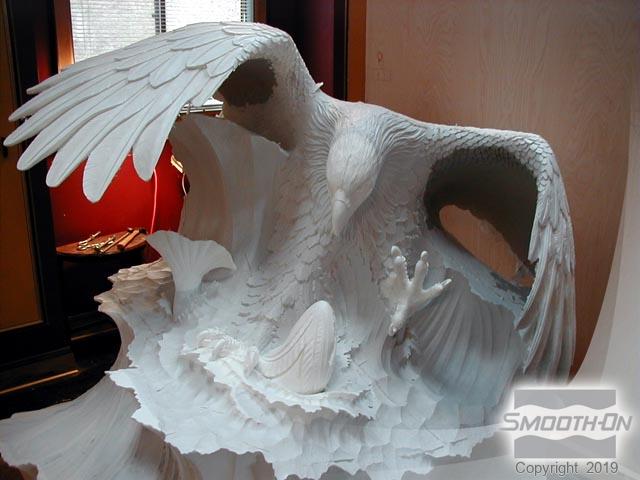
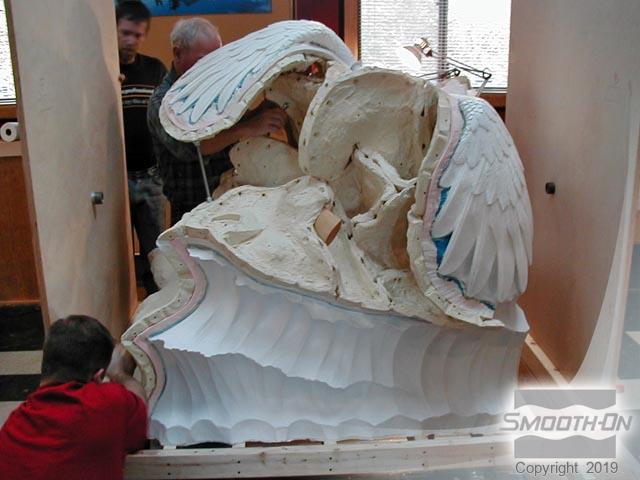
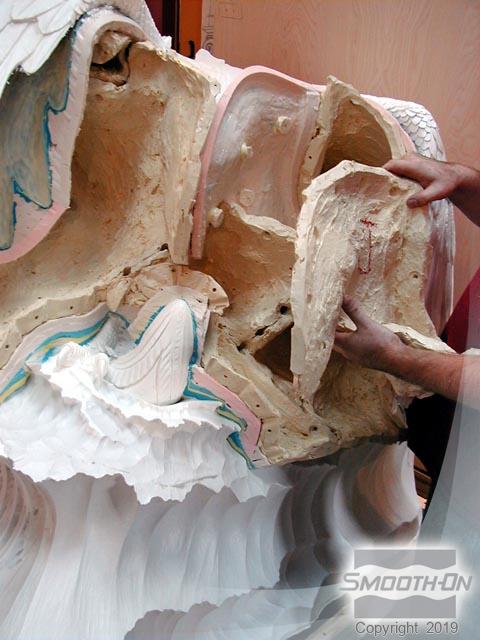
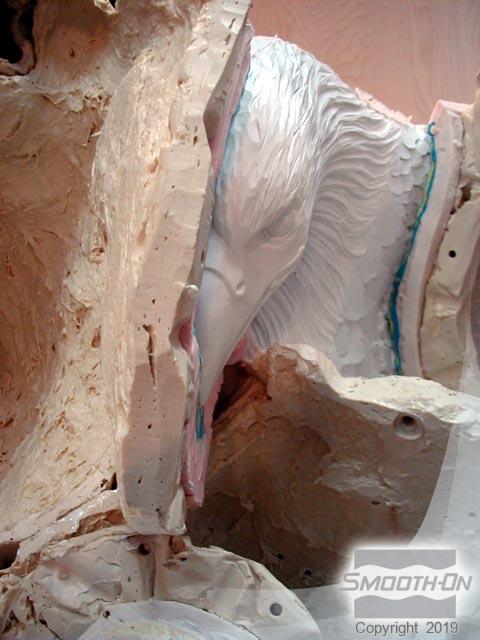
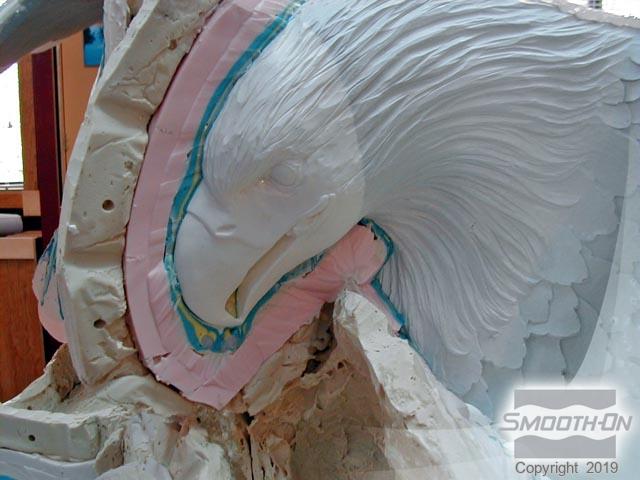
Step 5: Demolding
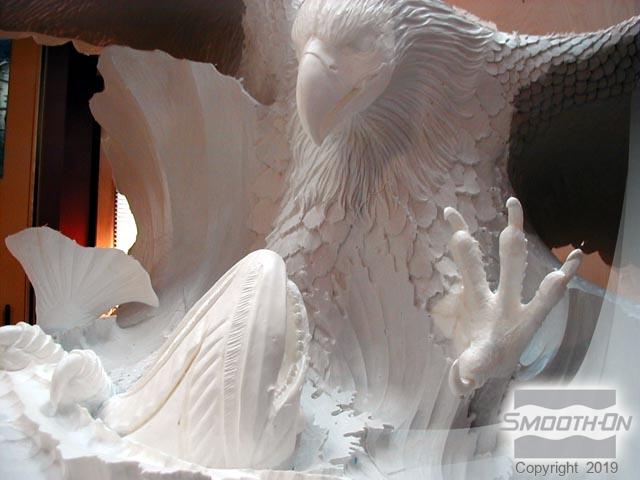
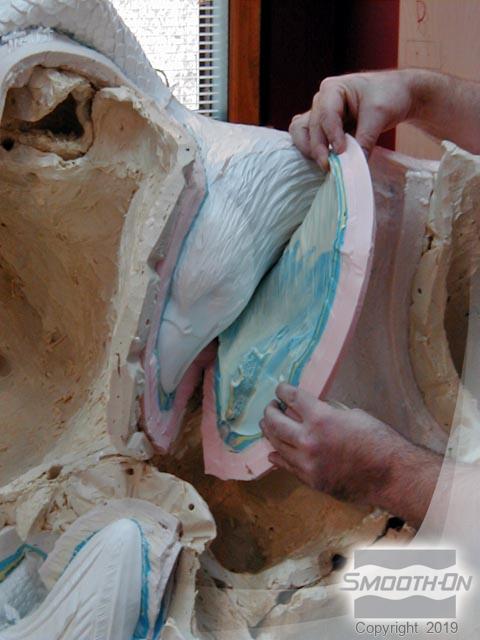
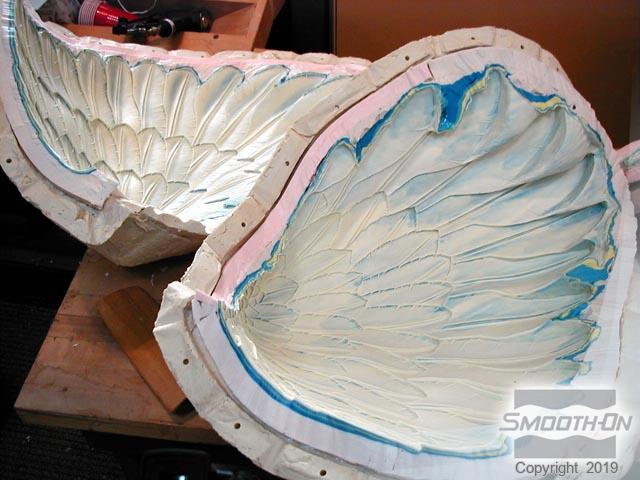
After the resin has fully cured, disassemble the support shell. The complexity of the mold can be seen when looking at the top of the wings with the bottom half of the shell removed. Remove the support shell from half of the Eagle's head. The casting reflects perfect detail from the original sculpture. A close-up of the mold of the left side of the Eagle's head also displays the high level of detail captured by the Mold Max® 10 rubber from the original. This shell was well thought out; multiple pieces are designed to eliminate 'locking' of the support shell. Even the mold of the wings is interesting to look at!
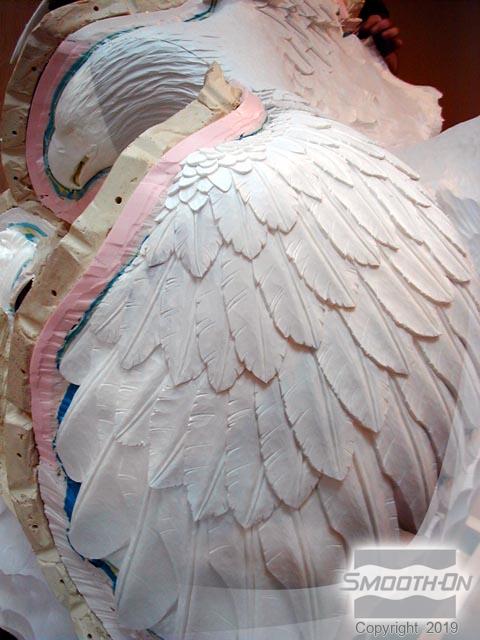
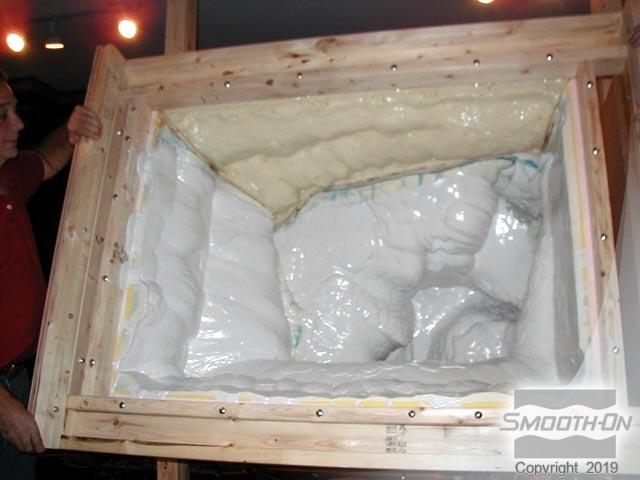
Step 6: Constructing Casting
The image below demonstrates how the bottom half of the wings and the sides fit together. A 'plug' was created as part of the mold under the wing sections. The finished Smooth Cast® 65D resin casting is hollow yet strong, and is only a fraction of the weight of bronze, plaster or even the wooden original.
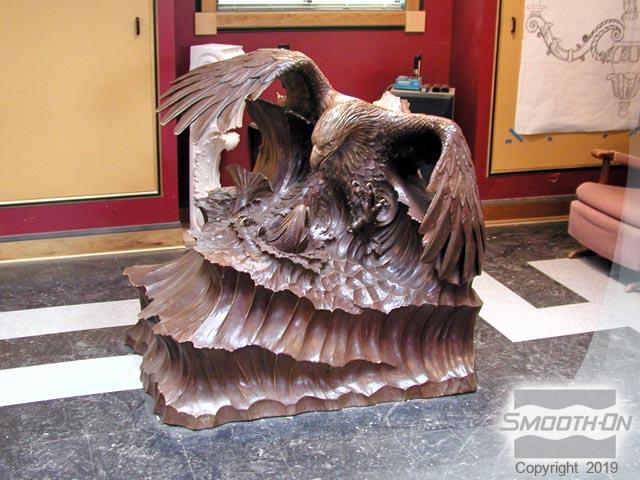
This client also commissioned Collier Studios to produce a bronze version of the Eagle sculpture. The wax master used to cast the bronze version was generated from this same mold. The close-up of the bronze casting displays all the detail of the original.